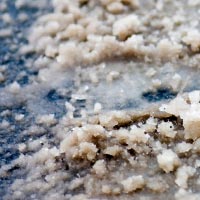
Why Salt Is Used on Roads

Human beings can’t live without salt. It’s a necessary nutrient, it’s used to seed rain clouds, soften household tap water, make chemicals and, most important, to make ice cream.
In Michigan with freezing winter temperatures, drivers know that warming the cars up in the morning isn’t the only inconvenience. Icy roads are, too. The same chemical reaction between ice and salt that creates creamy, delicious ice cream also keeps our roads and sidewalks free of dangerous ice during the cold winter months.
A salt and sand mixture is frequently spread over roads before or after a snow or ice storm. Salt lowers water’s freezing point, causing any ice already formed to melt even though the air temperature remains well below freezing. The sand helps keep the salt in place, plus it adds a bit of traction to wet and often slushy roads.
While road salting helps people travel safely, it has drawbacks. It can cause major body and undercarriage damage to your vehicles unless you take extra care and precaution.
If you’re one of the many who must travel the saline streets in the land of the ice and snow, we have some great tips to help protect your vehicle from the ravages of road salt.
Plan Ahead
The best time to prevent salt damage to your vehicle is before the first snowflake falls; a little car maintenance will help keep the rust away.
- In late autumn, thoroughly wash every inch of your vehicle, including the underside.
- Apply a meticulous coat of wax, followed by a wax sealant to help keep the wax adhered to the vehicle’s paint.
- Seal the undercarriage, paying closest attention to the brake and fuel lines, as these are the most susceptible items for rust and corrosion and make your vehicle unsafe if they fail. You can buy a product to do this, or you can have it done professionally.
Keep a Clean Machine
Keeping your vehicle as clean as possible during the winter will go a long way to cut down the damage done by salt and sand.
- Take your vehicle to the car wash as often as possible. Many car washes in the “snow belt” offer steam cleaning and undercarriage cleaning as well as traditional car washing.
- Have your car re-waxed and sealed when you have it washed.
- Check out a mobile automobile detailer who can come to your workplace and do several vehicles at once.
At-Home Car Washing Tips
If you can’t get to any of the above, you’ll need to brave washing your car at home. Try these tips.
- Wear a pair of waterproof gloves.
- Begin by spraying down your vehicle using a garden hose equipped with a high-pressure nozzle, moving from top to bottom.
- Be sure to get as much mud and muck from beneath the wheel wells, under the bumpers, behind the fenders and in any other areas prone to salty slush splashes.
- Follow with a warm, bubbly scrub down, using soap made especially for car washing. Dish soap strips your car’s wax. Use a wash mitt or a sponge, never a shop rag, which may have metal bits in it.
- If the vehicle is really salty, add a couple of tablespoons of baking soda to the wash water to help remove and neutralize the salt.
- Don’t neglect to scrub all the rubber, trim, outside door seals, tires, and the wheel covers.
- Rinse thoroughly, making sure to remove all traces of soap.
Dry as a Bone
Don’t stop now! Take the time to finish the job now, and you’ll have less chance of discovering hidden damage after it’s too late. Here are the next steps in the process:
- Carefully dry the edges of the doors inside and out, including the undersides of door handles, all hinges, plus the hood and trunk edges. This helps keep them from freezing shut.
- Use a good quality spray protectant on all exterior rubber or vinyl surfaces. It may be best to spray they applicator you are using instead of spraying the product directly onto the surface. This will avoid any overspray onto the paint.
- After a winter washing, apply an additional coat of wax to all exposed metal, using a hand-held hairdryer to warm the metal surface a bit before applying the wax. Warm your buffing rag, too, to help the wax better adhere to the cold metal.
Courtesy: Auto Owners Insurance
